Server Side PHP Building Guide

Install PHP
For this guide, I installed PHP on the local end. I recommend installing it on the local end and testing it out a little bit before configuring it into your VPS.
To get started, first you first have to install PHP. You can refer to the PHP documentation here. There is a basic tutorial here, I would focus on specifically the form section.
MacOS
First install homebrew if it's not already installed:
/bin/bash -c "$(curl -fsSL https://raw.githubusercontent.com/Homebrew/install/HEAD/install.sh)"
Verify installation:
brew --version
Install PHP:
brew install php
Verify installation:
php -v
To start PHP:
brew services start php
To stop PHP:
brew services stop php
To restart PHP:
brew services restart php
Linux (Debian)
Install PHP:
sudo apt install php
Check version:
php -v
Running a server
Since we are installing PHP on the local ends instead of using a web server (on a VPS you would configure php within your web server), we can use the built-in development server:
php -S localhost:8000
Guestbook

Guestbooks are designed for users to leave comments on your site. You can pretty much build your entire guestbook service in PHP. While guestbook services do exist, the less you can rely on external services, the better.
Guestbooks can be both a blessing and a curse. If your site is anonymous, then there is less to worry about, since most of your viewers don't know much about you.
If your site isn't anonymous, then you need to take more proactive measures for reasons I don't have to explain. In this guestbook version, the site owner has to approve all the comments before they are displayed.
To see the tools in action, download the Guestbook project, open it with VSCodium, and run it within VSCodium within terminal with:
php -S localhost:8000
index.php
You can store data within $_SESSION so you don't have resend it in every GET or POST request on every page. To start a session, you will use the session_start() at the start of each script:
session_start();
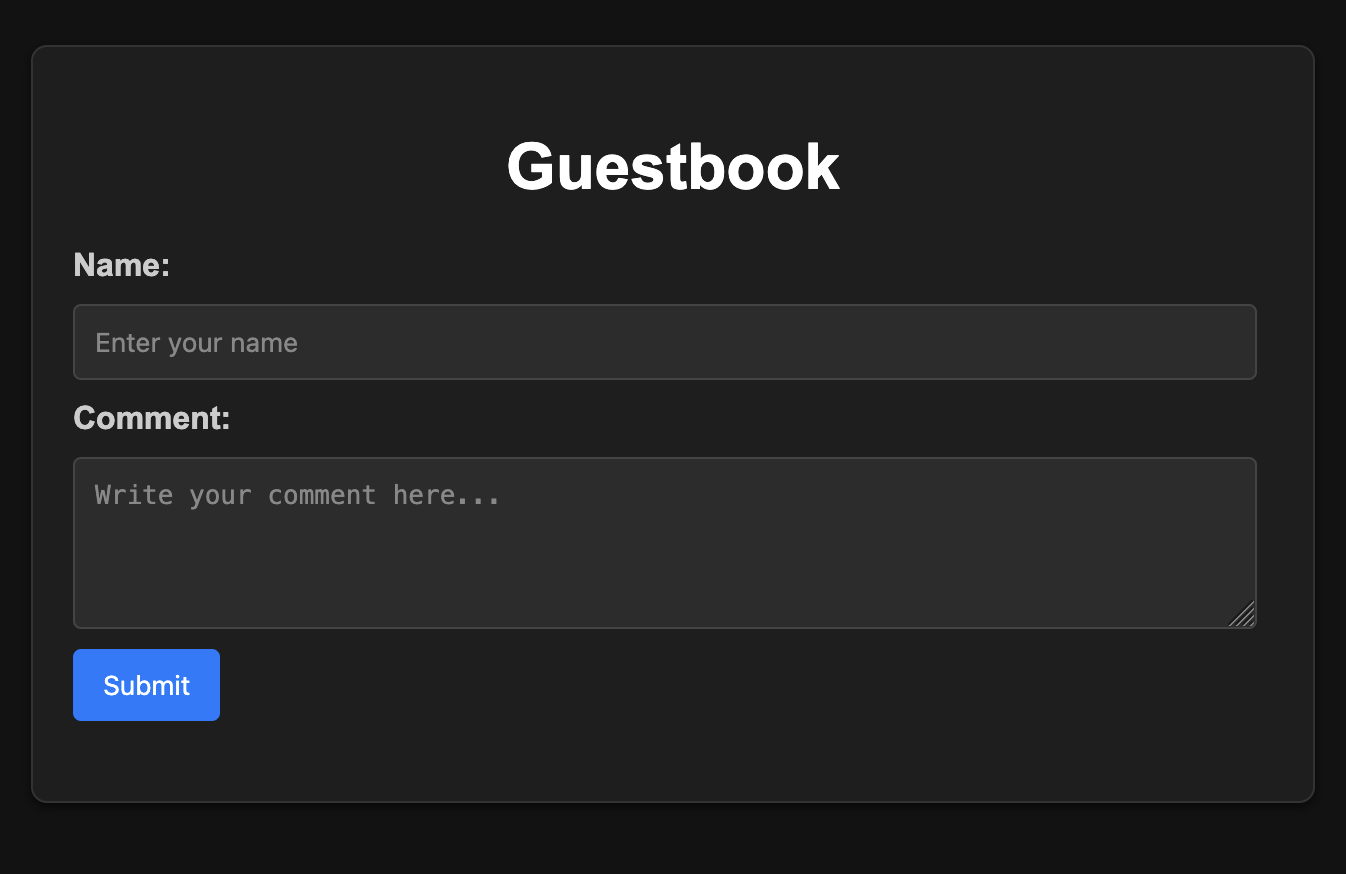
Now the magic in all of this is the interaction between the HTML and the PHP. To submit a comment to a form, the form is first written in HTML. The action will specify server-side script that will handle the submitted form data. The method will specify whether to send or receive the data. Since we are submitting data, the POST method is used:
                        <form action="save_comment.php" method="POST">

                        <label for="name">Name:</label>

                        <input type="text" id="name" name="name" maxlength="50" placeholder="Enter your name" required>


                        <label for="comment">Comment:</label>

                        <textarea id="comment" name="comment" rows="4" maxlength="500" placeholder="Write your comment here..." required></textarea>


                        <input type="hidden" name="parent_id" value="0">


                        <button type="submit">Submit</button>

                        </form>
save_comment.php
Now let's go to the php script that will handle the form data. First we need a file to store comments:
$file = 'comments.txt';
There are multiple inputs from the user's form data. First they specified their name and a comment. Since they were submitting the data, $_POST will be used.
parent_id just checks whether they were replying to a previous comment or not.
trim() will remove any white space.
htmlspecialchars() is really important to prevent XSS attacks because it converts any special characters to HTML entities. ENT_QUOTES does the same for quotes.
UTF-8 is the character encoding.
timestamp records when the comment was submitted.
                        $name = htmlspecialchars(trim($_POST['name']), ENT_QUOTES, 'UTF-8');

                        $comment = htmlspecialchars(trim($_POST['comment']), ENT_QUOTES, 'UTF-8');

                        $parent_id = htmlspecialchars(trim($_POST['parent_id']), ENT_QUOTES, 'UTF-8');

                        $timestamp = time();
You want to make sure that the comment the user is submitting is not just spam. To do so, you can set a limit on the amount of characters the name/comment can be and block blank names/comments. We are using session storage, so the data can go back to index.php without manually resending the errors:
                        if (strlen($name) > 50) {

                        $_SESSION['errors'][] = 'Name is too long. Maximum 50 characters allowed.';

                        }

                        if (strlen($comment) > 500) {

                        $_SESSION['errors'][] = 'Comment is too long. Maximum 500 characters allowed.';

                        }

                        if (empty($name) || !preg_match('/\S/', $name)) {

                        $_SESSION['errors'][] = 'Name cannot be empty or just spaces.';

                        }

                        if (empty($comment) || !preg_match('/\S/', $comment)) {

                        $_SESSION['errors'][] = 'Comment cannot be empty or just spaces.';

                        }
To prevent spam further, we need to make sure we are limiting the rate the user can submit the comment. Right now it's only 10 seconds, but it can be adjusted accordingly. We know it's the user submitting multiple submissions, due to the timestamp:
                        if (isset($_SESSION['last_submission']) && ($timestamp - $_SESSION['last_submission']) < 10) {

                        $_SESSION['errors'][] = 'You are submitting too quickly. Please wait a few seconds.';

                        header('Location: index.php');

                        exit();

                        }

                        $_SESSION['last_submission'] = $timestamp;
Only IF the comment passes all those tests, then we can append all of that to comments.txt:
$entry = $id . '|' . $parent_id . '|' . $name . '|' . $comment . '|' . $timestamp . "\n";
file_put_contents($file, $entry, FILE_APPEND);
login.php
Now, as the site owner, to approve the comments we will need to specify a specific login for the site owner and then once logged in, have the site owner be able to approve or disapprove the comment within comments.txt. Once they approve it, it's sent back to index.php where it is displayed.
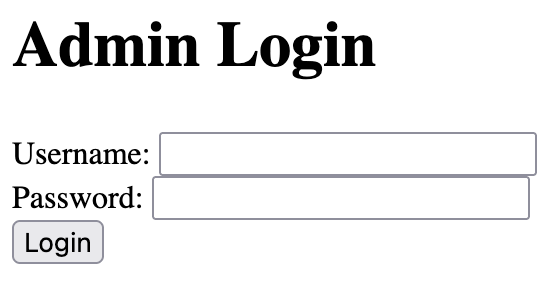
First we need to build a logjn page for the site owner. Make sure only you know the username and password - no one else. And do not make the password '1234' like in this example.
POST is of course used because you're submitting the username and password.
Session tell the pages that the admin is logged in.
The header will redirect you to the approve_comments.php which will give you a dashboard for approving comments:
                    $admin_username = 'admin';

                    $admin_password = '1234';


                    if ($_SERVER['REQUEST_METHOD'] === 'POST') {

                    $username = trim($_POST['username']);

                    $password = trim($_POST['password']);


                    if ($username === $admin_username && $password === $admin_password) {

                    $_SESSION['logged_in'] = true;

                    header('Location: approve_comments.php');

                    exit();

                    } else {

                    $error = 'Invalid credentials. Please try again.';

                    }
Then of course, for every form, we need to write it in HTML:
                    <form method="POST">

                    <label for="username">Username:</label>

                    <input type="text" name="username" id="username" required>


                    <label for="password">Password:</label>

                    <input type="password" name="password" id="password" required>


                    <button type="submit">Login</button>

                    </form>

approve_comments.php
Now we have to write an interface for the admin to approve/reject the comments. Since the admin is submitting an approval/rejection to the server, we will have to use yet another POST method. If the action is approved, then the comment is given the status of approved and appended to comments.txt. If the action is rejected, then the is never given the status of approved:
                    if (empty($_SESSION['logged_in'])) {

                    header('Location: login.php');

                    exit();

                    }


                    $file = 'comments.txt';


                    if ($_SERVER['REQUEST_METHOD'] === 'POST') {

                    $id = $_POST['id'];

                    $action = $_POST['action'];


                    $comments = file($file, FILE_IGNORE_NEW_LINES);

                    $updated_comments = [];


                    foreach ($comments as $comment) {

                    list($comment_id, $parent_id, $name, $comment_text, $timestamp, $status) = explode('|', $comment);


                    if ($comment_id === $id) {

                    if ($action === 'approve') {

                    $status = 'approved';

                    } elseif ($action === 'reject') {

                    continue;

                    }

                    }


                    $updated_comments[] = implode('|', [$comment_id, $parent_id, $name, $comment_text, $timestamp, $status]);

                    }


                    file_put_contents($file, implode("\n", $updated_comments) . "\n");

                    header('Location: approve_comments.php');

                    exit();

                    }


                    $comments = file($file, FILE_IGNORE_NEW_LINES);
The form has to be written in HTML for the approval/rejection of comments:
                    foreach ($comments as $comment):

                    list($id, $parent_id, $name, $comment_text, $timestamp, $status) = explode('|', $comment);

                    if ($status === 'pending'): ?>

                    <li>

                    <strong><?php echo htmlspecialchars($name); ?></strong>:

                    <?php echo htmlspecialchars($comment_text); ?>

                    <form method="POST" style="display:inline;">

                    <input type="hidden" name="id" value="">

                    <button type="submit" name="action" value="approve">Approve</button>

                    <button type="submit" name="action" value="reject">Reject</button>

                    </form>

                    </li>

logout.php
Then when the admin clicks 'logout', the logout.php script is loaded and the admin logged out with session_destroy():
                    session_start();

                    session_destroy();

                    header('Location: login.php');

                    exit();
index.php
We've made it all the way back in a circle. Within index.php, we want to display only the approved comments within comments.txt. To do so, we will parse through the comments within comments.txt. If the comment's parent_id = 0 then it's a top level comment, otherwise it's a reply. If the status is approved for the particular comment within comments.txt, then it will add each component from that comment to the array (comment_tree) and display it:
                    $file = 'comments.txt';

                    if (file_exists($file)) {

                    $comments = file($file, FILE_IGNORE_NEW_LINES | FILE_SKIP_EMPTY_LINES);


                    $comment_tree = [];

                    foreach ($comments as $entry) {

                    list($id, $parent_id, $name, $comment, $timestamp) = explode('|', $entry);

                    if ($status === 'approved') {

                    $comment_tree[$parent_id][] = [

                    'id' => $id,

                    'name' => $name,

                    'comment' => $comment,

                    'timestamp' => $timestamp,

                    ];

                    }


                    }


                    display_comments(0, $comment_tree);

                    }
So to review:
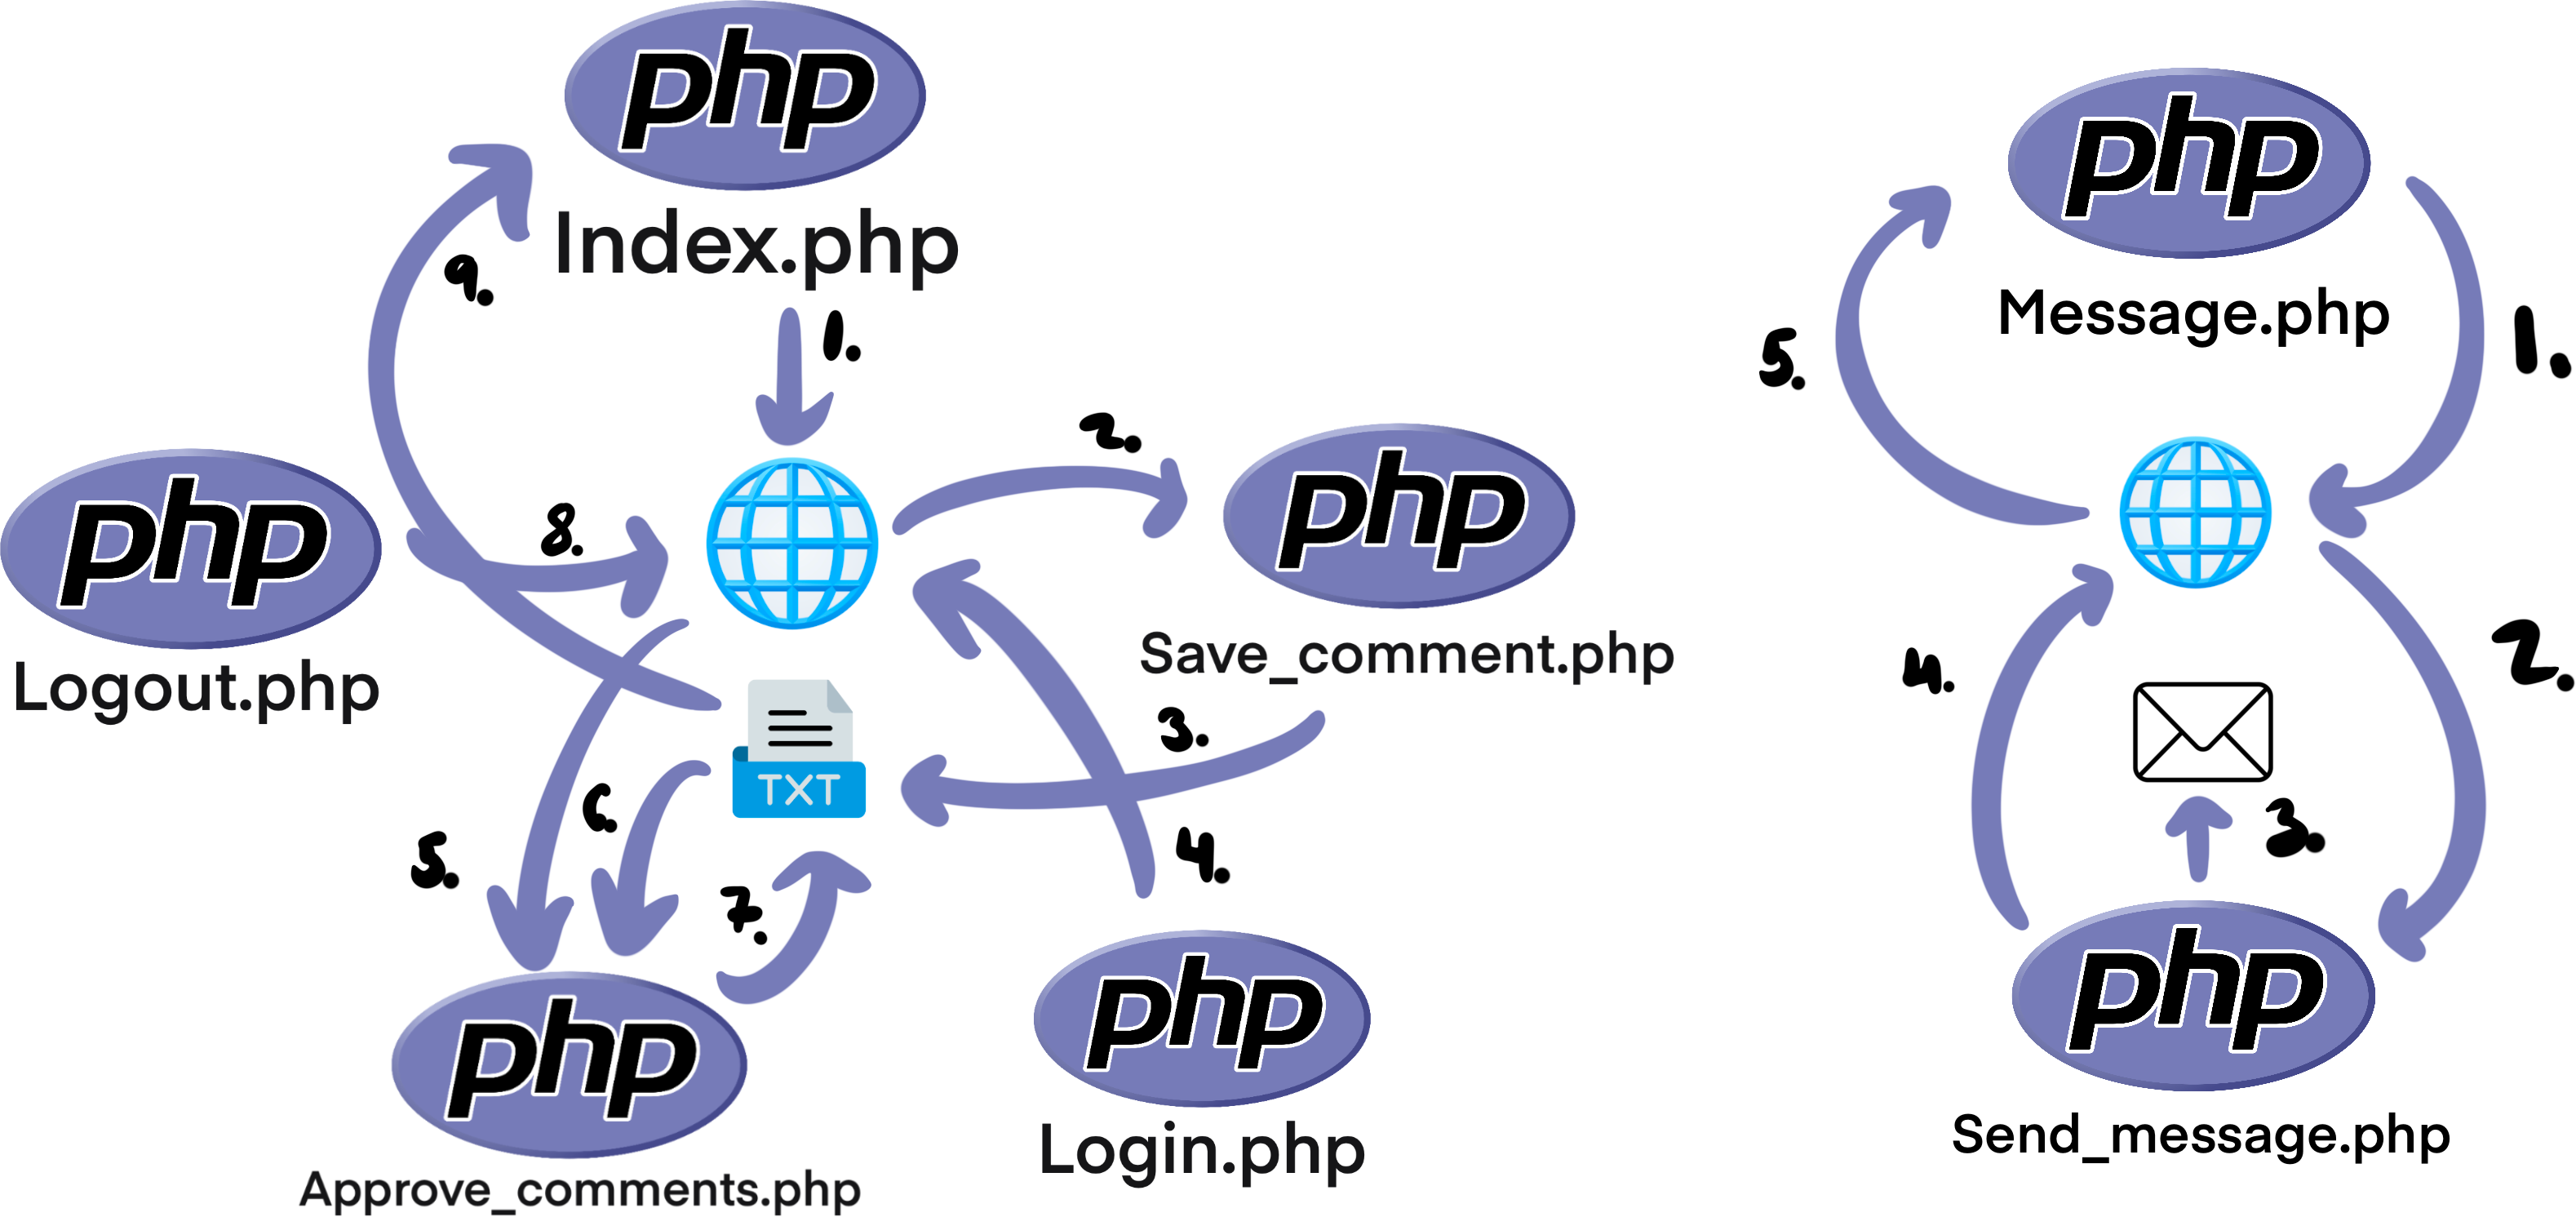
1. The form is first built in index.php, which specifies the comment to go to save_comment.php.
2. The save_comment.php appends the file to comments.txt if the comment is valid.
3. Since the comment isn't rejected or approved yet, it's pulled from comments.txt and displayed on approve_comments.php. If the admin decides to approve it, it's given the approved status within comments.txt.
4. The index.php pulls from comments.txt, checks for this approved status, and displays the comments that are approved.
Contact Form

Contact forms are really nice when you want someone to directly email you a message. This is especially useful is you want to collect ideas from specific users. It's a bit easier to write too, since all the moderation can be handled within your email server.
message.php
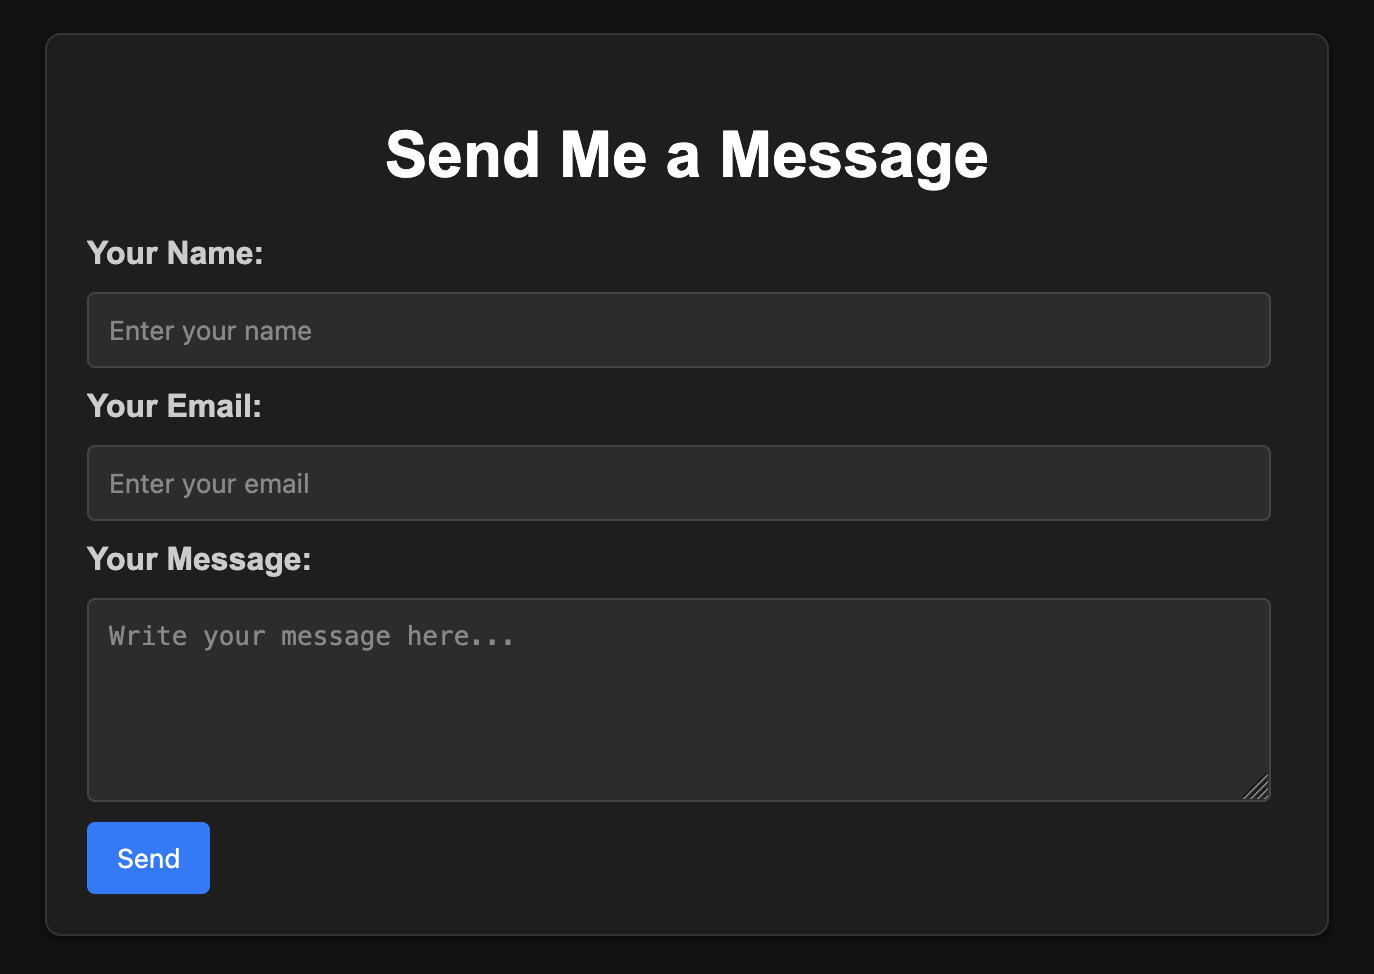
First we will write the form on message.php. Since the user is inputting data, the POST method is used. The form data will be sent to send_message.php:
                        <form action="send_message.php" method="POST">

                        <label for="name">Your Name:</label>

                        <input type="text" id="name" name="name" maxlength="50" placeholder="Enter your name" required>


                        <label for="email">Your Email:</label>

                        <input type="email" id="email" name="email" maxlength="100" placeholder="Enter your email" required>


                        <label for="message">Your Message:</label>

                        <textarea id="message" name="message" rows="5" maxlength="1000" placeholder="Write your message here..." required></textarea>


                        <button type="submit">Send</button>

                        </form>
send_message.php
You would specify your email within this variable:
$to_email = 'your_email@example.com';
These three variables are taken from the from submitted on message.php:
$name = filter_var(trim($_POST['name']), FILTER_SANITIZE_STRING);
$email = filter_var(trim($_POST['email']), FILTER_VALIDATE_EMAIL);
$message = htmlspecialchars(trim($_POST['message']), ENT_QUOTES, 'UTF-8');
Then, just a basic checklist for spam (can be adjusted based on user preference):
                        if (!$name || strlen($name) > 50) {

                        $errors[] = 'Invalid name. Maximum 50 characters allowed.';

                        }

                        if (!$email) {

                        $errors[] = 'Invalid email address.';

                        }

                        if (!$message || strlen($message) > 1000) {

                        $errors[] = 'Message cannot be empty and must be less than 1000 characters.';

                        }
When you receive the email from the user, you can further specify how you would like that email to be formatted:
                        $subject = 'New Message from Guestbook';

                        $email_body = "Name: $name\nEmail: $email\n\nMessage:\n$message";

                        $headers = "From: $email";
Then finally, if all checks are valid, send the email using session:
                        if (mail($to_email, $subject, $email_body, $headers)) {

                        $_SESSION['message_status'] = [

                        'type' => 'success',

                        'message' => 'Your message has been sent successfully!',

                        ];

                        } else {

                        $_SESSION['message_status'] = [

                        'type' => 'error',

                        'message' => 'Failed to send the message. Please try again later.',

                        ];

                        }
message.php
Then we can pull back from that session within message.php, and display whether the user's message was sent successfully or not:
                    if (!empty($_SESSION['message_status'])) {

                    echo "><div class='" . ($_SESSION['message_status']['type'] === 'error' ? 'error' : 'success') . "'>";

                    echo htmlspecialchars($_SESSION['message_status']['message']);

                    echo ">div";

                    unset($_SESSION['message_status']);

                    }
And that's a basic watered down version of PHP. You can see all the POSTS and GETS from the images below:
Guestbook:
.png)
Contact Form:
.png)